Prior, to getting into the Carl bot reaction roles, let’s be clear on what Reaction Roles are? and related guidelines to implement in no time? Let’s get started!
What is Carl bot?
Carl Bot is an essential tool for Discord servers, particularly those large ones. Whereas, these bots have many functions that can be used. One of those functions is the Reaction Role. Reaction roles are the best way to automatically give users roles instantly once they join your server, or to provide them roles created on their activity.
What Is Reaction Roles?
It’s very common that every user joins with the role assigned to them. Whereas, this develops a hard to target for a specific group of users when communicating.
Let’s take one example: If an individual wants to pick a tech-related server where people love to talk about Android and iOS. Here, we can generate two roles Android and iOS.
As a result of this, instead of providing a role manually to each user, we can just pick a role instead.
In accordance with this, we can create channels on the server that may be used only by the Android roles assigned. We can also connect through iOS users without disturbing any Android users by fetching them a @iOS tag. Hence, you can see the result may vary according to the cases.
How to setup to be done:
#1 Setting up Roles
We serve you with roles required or the roles you wanted to set up in Reaction Roles. By implementing this, you let your users pick their desired role from the given choices. Here, we have to add the roles that would be listed as a choice. Simply, open Discord through an app or the web.
- Initially, pick the Discord server’s name, then hit “Server Settings” from the dropdown.
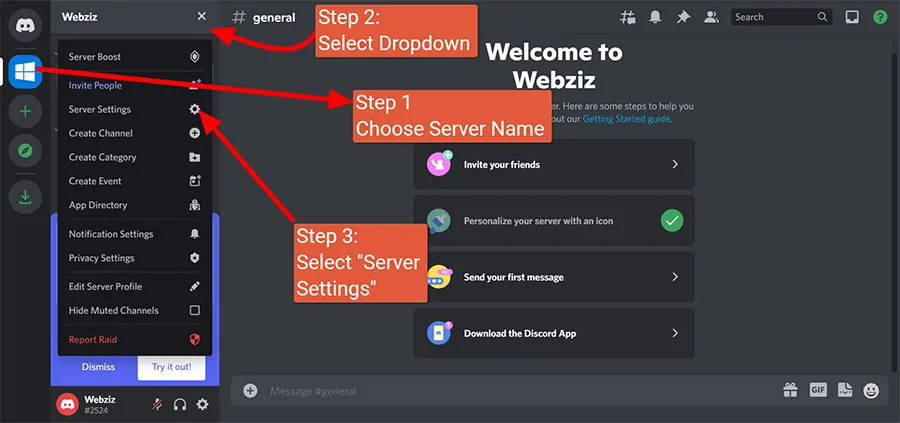
- Then, you will be prompted with diverse settings of the server. Confirm with “Roles”.
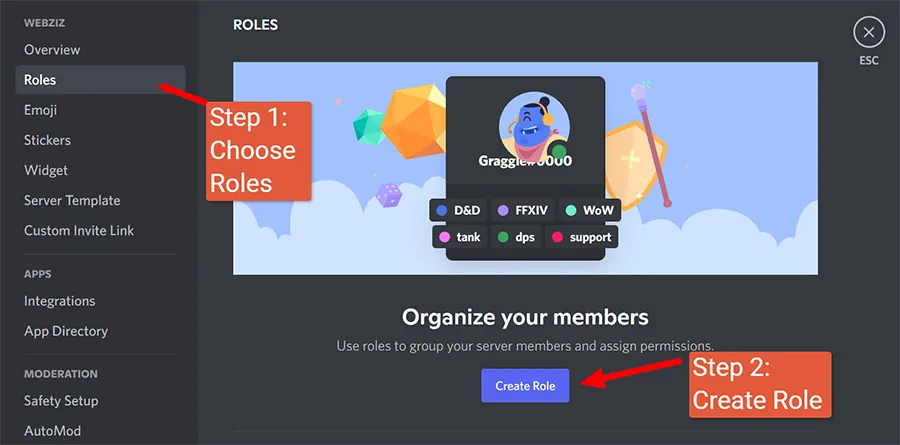
- You need to pick your role’s name according to your desired name. You can even change the color and icon of the role to make it look different.
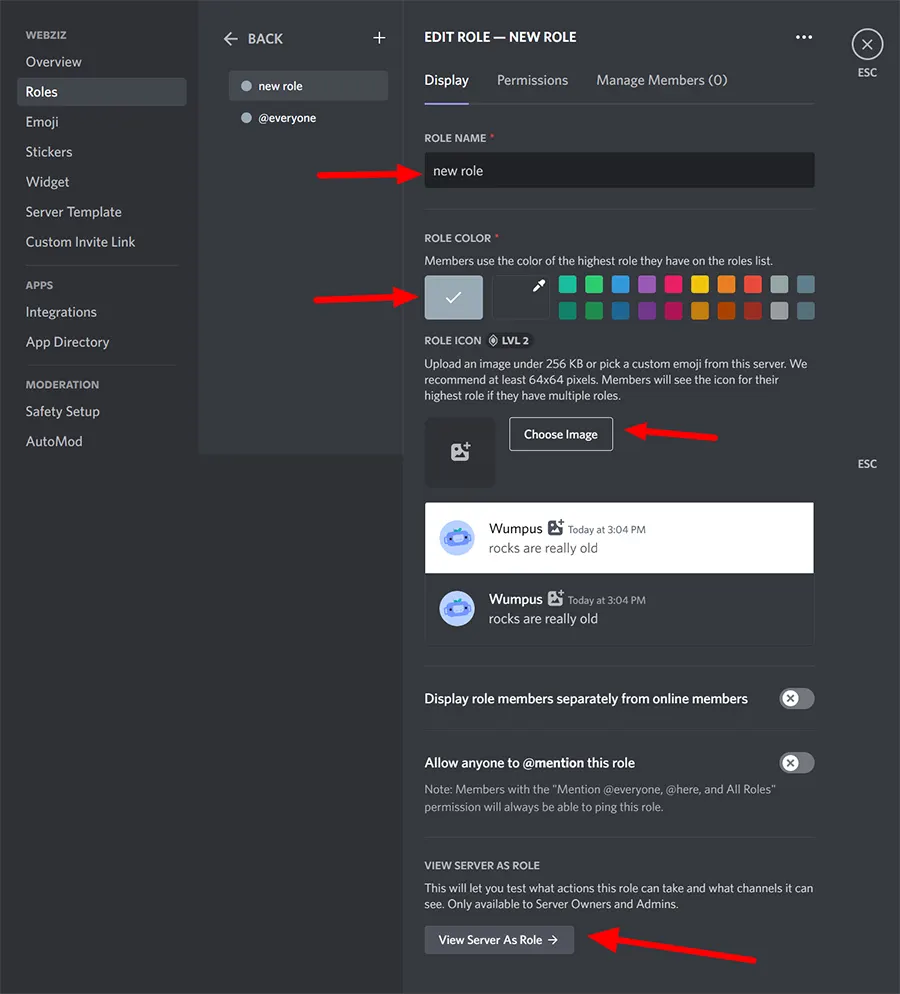
- Finally, hit “Save changes” to save your edited roles.
#2 Inviting Carl Bot on your Server
Visiting Carl Bot’s website
- Check out the Carl Bot on Google or You can also make use of the link that can redirect you to their official website.
- Here, hit “Login with Discord”.

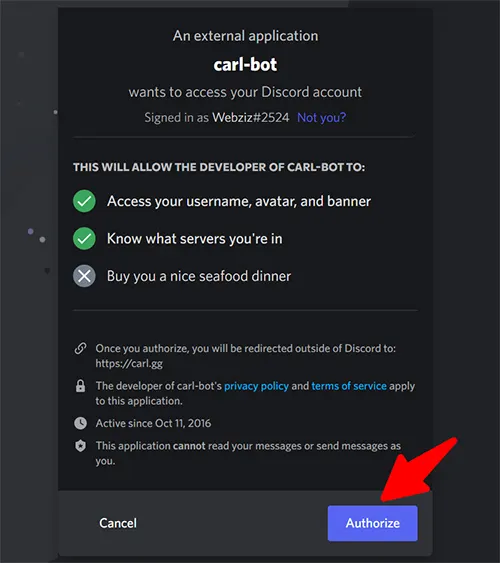
- Wait for the authorization to take place. Now, you will be asked to authorize the bot. Hit the option – “Authorize”
Pick your Discord Server
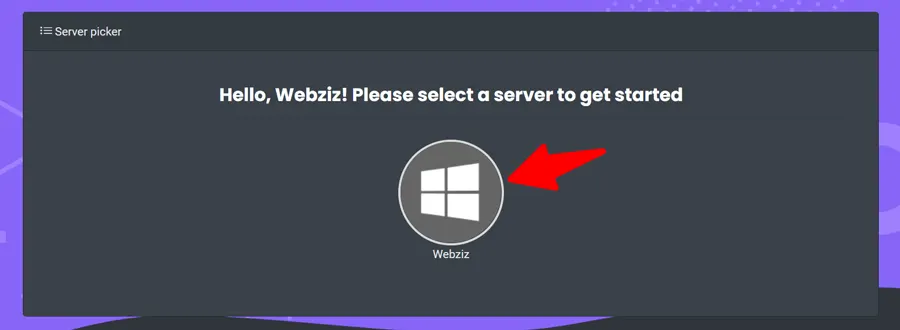
- Now, you will be redirected to the selection screen.
- Here, you need to choose which Discord server you wanted the Carl bot to be in.
Invite the Bot to your desired Server
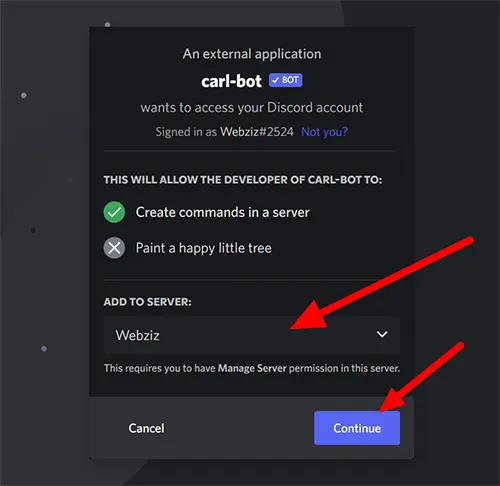
- Once you have confirmed with the server you need, which you want the bot in – you will be prompted for permission to access your server. Hit the option – “Continue”
- Further, you will be prompted with additional permission (You can modify this permission later).
- Further, simply Scroll down and choose “Authorize”.
- Try to finish the Captcha challenge to verify that you’re not a robot.
- After that, the bot will be set up on that server. Open Discord, navigate to your server’s Server Settings, and then drag the Carl-bot role entry to the top of the list of roles to manage them. Click Save Changes after that.

Finally, you have invited Carl Bot to your server! Next moment, you will be redirected to this page and you can choose “Get Started” to customize your Carl Bot’s settings.
#3 Setting Up Reaction Roles on Carl Bot
How to access the Main Dashboard?
- In Reference to the above step, once you have completed “Get Started”, you will be directed again to this site. Here, you can see the functions that the Carl Bot provides you, let’s focus on Reaction Roles, give a click on Next until you’re redirected to the Main Dashboard.
- Here, you can see the Dashboard, here just scroll below to pick the utility list.
- Finally, confirm with “Reaction Roles” by tapping on it.
Creating new reaction role
- Here, you can see “Create new reaction role” on this tab which will allow you to generate your own reaction roles.
- Later, you will see a pop-up message to select the modes as referred to below.
- Here, you may have three types of Modes:
- Post embed mode – This may permit you to add and using this you can edit an embedded post that you have created.
- Use ID mode- This can assist you to add a reaction role to an old message which you have sent. Here, you have to get a message ID for this mode.
- Use the most recent message in the channel – Using this, will allow you to use the recent message sent on the channel which you have chosen to be the reaction roles message.
Eventually, you will be asked on which channel you want to access the reaction role, the content you want to put an “Add emoji”, especially the emoji that the users can see and react to.
As per the content section, you have the option to create a message that can be displayed on the screen. want to add emoji, use Add Emoji to add even more choices as per your requirements.
You even have the option to opt for message types, allowed members, and blacklisted members.
Once you have done with the setting up, hit Create.
#4 Verifying the Reaction Roles
- Get back to your server and make sure the message and the emoji for the reaction roles have been sent & verified. Ensure Carl Bot’s permission is seen above the Roles that indicate giving out.
- Later, it should consist of the message and the options added to proceed.
- Finally, the embedded message should be under #general channel and the reaction roles must be working, you can react to the message and verify whether it works or not. In this, the role should be automatically provided to you by the bot.
Yes, you are done with the fully working reaction role system using Carl Bot.
How to Make Reaction Roles on Discord – Video Reference
FAQ’s
How do Carl-bot’s reaction roles work?
Whereas, these commands come in much handy in convinced situations, but even cause confusion to people unfamiliar with how Carl-bot’s reaction roles work or are being fixed. It moves the reaction roles from one message to another. Eventually, it works even if the message was removed.
How do I use Carl’s bot on Discord?
Here, you have the first step to invite Carl Bot to your Discord server. Carl Bot consists of countless features that include reaction roles, logging, moderation, suggestions, and even more. If it is a reaction role, you need to have a high limit (up to 250 roles), different modes, multiple roles (with one reaction), and even more.
How do you specify roles and channels in a bot?
Add on to this, the bot uses what are called converters that help specifying roles, members, channels, etc.. at ease & foolproof. If you are prompted to mention a member, you have to initiate it as a mention (texting a person), an id, name, or via their nickname. Hence, the principle works for every single command which is applicable.